How to Create a Social Stream On Your WordPress Website
In the world of communications, lots of people are members of various social networking websites. Every company has an official social media page on Facebook or Google+ and lots of companies notify their customers of their latest news or updates using Twitter. Any photographer has his own profile page on Instagram and lots of companies have their own video channel on YouTube and Vimeo.
We might be using the social media networks for any of the above reasons but, have you ever been decided to share your social networking activities with your website visitors? This is exactly what we call it Social Stream. A social stream, is a single stream of news, photos, videos and updates from multiple social media networks.
In this article I’m going to introduce you a WordPress plugin that allow you to combine all of your social networking activities into one single social stream and display on your WordPress website as a stylish social stream very easily.
WordPress Social Board plugin allows you to create a social media stream of various social networking accounts with multiple users. The plugin can display your social stream in 6 different formats. It supports 13 and still growing social networks and includes more than 30 different feed options. Your visitors can share your posts on their Facebook, Twitter, Google or LinkedIn profiles from your website. They will also have the option to reply, re-tweet or favorite the Twitter posts on your social stream. They can even filter your social stream by social networks or using custom defined filters. You can even change the style of your social board using the plugin theme manager or customize it via CSS stylesheets, and make it unique to your website.
Let’s install it!
To start with, first download the WordPress Social Board plugin on your PC.
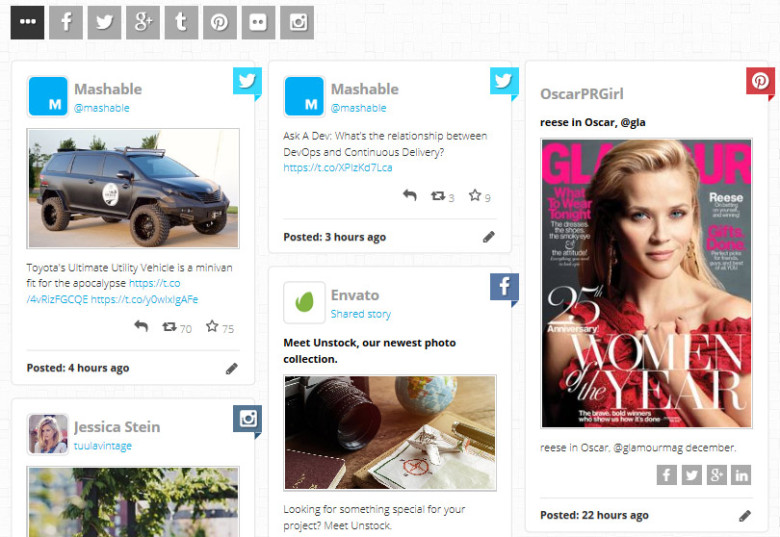
You can also take a look at WordPress Social Board live demo to see how it’ll look on your website.
After downloading the plugin you will be given a zip file containing another zip file wordpress-social-board-*.zip that it is the original plugin file.
To install the plugin on your website, do the following steps:
1. Go to your WordPress admin panel. Click on Plugin » Add New button.
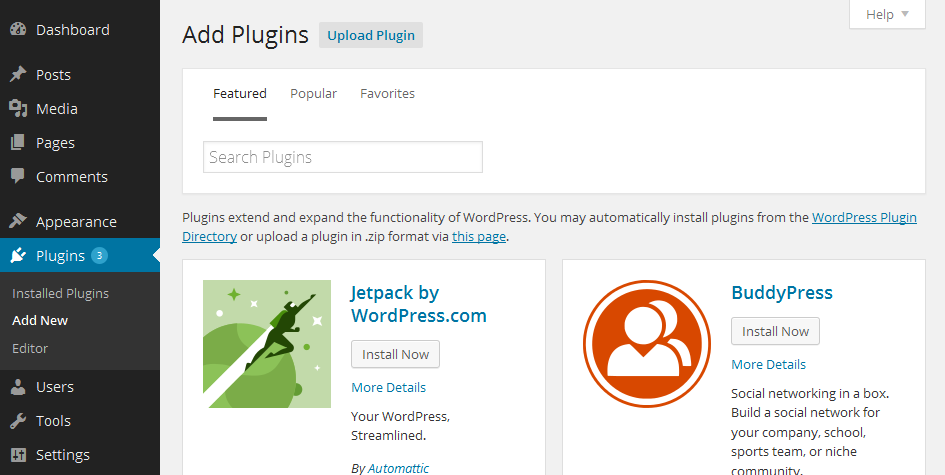
2. Then click on the Upload Plugin button.
You will see a screen like the one above.
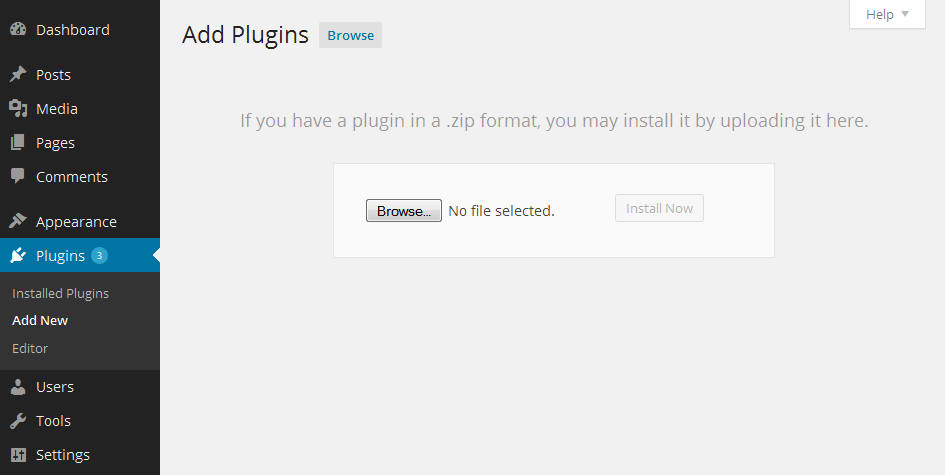
3. Click on the Browse button and select the plugin file wordpress-social-board-*.zip (zip file only) from your PC and upload it.
You will be taken to “activate a plugin” page just like this one:
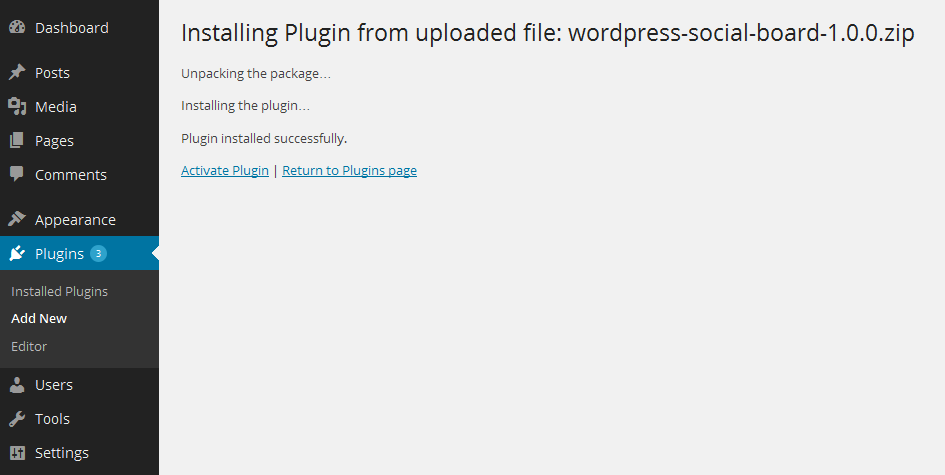
4. Click on Activate Plugin link to complete the plugin installation.
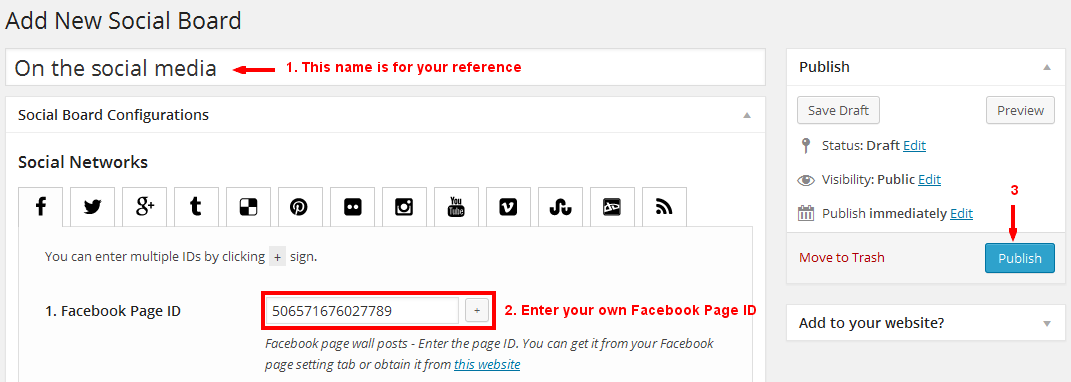
Now, you have installed the WordPress Social Board plugin. After installation, you would have to create your Social Board. Here we will explain you that how to create a Facebook wall on your website.
1. Go to WordPress admin panel
2. Go to Social Board » Add New Board and fill out the form as follows.
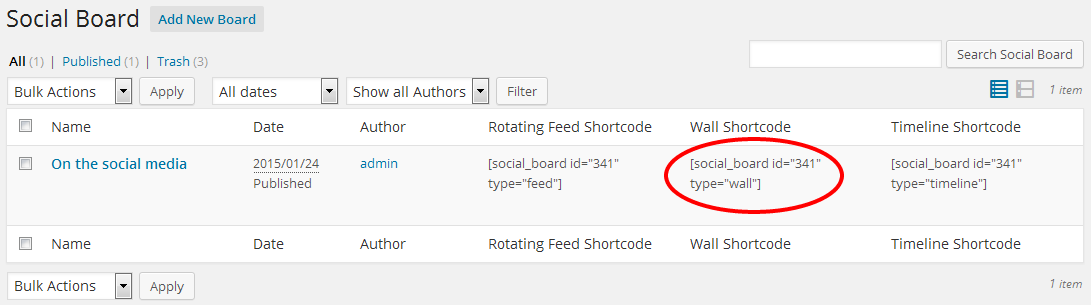
3. Go to Social Board » Manage Boards page.
4. Copy the Wall Shortcode that is marked with a red circle.
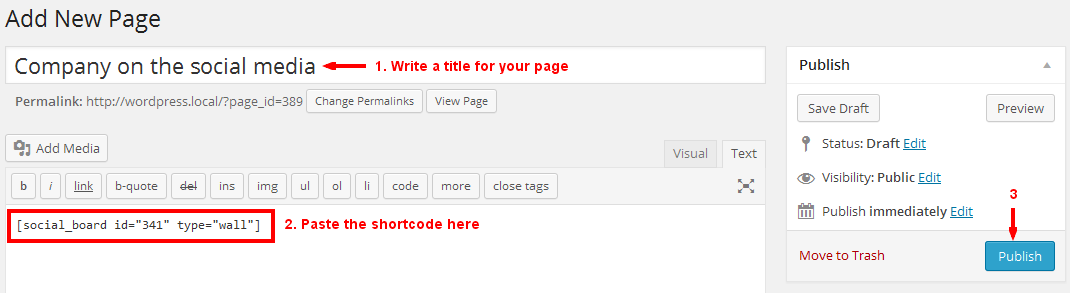
5. Go to WordPress admin panel » Pages » Add New Page
6. Paste the shortcode into your created page content as follows. You can also put the shortcode in a post instead.
7. Your social wall is ready now. Go to your created page by clicking on the “View Page” button.

Final word…
If you used WordPress Social Board plugin and you have any questions or suggestions concerning to this plugin please, let us know your thoughts on it by commenting below.